Anaconda is an open-source programming that contains Jupyter, spyder, and so forth that are utilized for enormous information handling, information investigation, weighty logical registering. Boa constrictor works for R and python programming language. Spyder(sub-utilization of Anaconda) is utilized for python. Opencv for python will work in spyder. Bundle renditions are overseen by the bundle the executives framework called conda.
What is Anaconda?
Anaconda is a free and open-source appropriation of Python and R programming dialects for information science and AI.
This will assist you with working on your Python organization and later on your bundle the executives.
Anaconda accompanies more than a 1500 bundles (counting the bundle the board framework conda) and a GUI named Anaconda Navigator. The Anaconda Navigator likewise introduce a few applications naturally like Jupyter Notebook, Spyder IDE and Rstudio (for R).
Anaconda is a bundle director, a climate supervisor, and Python dissemination that contains an assortment of many open source bundles. This is invaluable as when you are chipping away at an information science project, you will see that you want various bundles (numpy, scikit-learn, scipy, pandas to give some examples), which an establishment of Anaconda comes preinstalled with. Assuming you want extra bundles in the wake of introducing Anaconda, you can utilize Anaconda’s bundle chief, conda, or pip to introduce those bundles. This is exceptionally profitable as you don’t need to oversee conditions between different bundles yourself. Conda even makes it simple to switch between Python 2 and 3 (you can learn more here). Indeed, an establishment of Anaconda is additionally the prescribed method for introducing Jupyter Notebooks which you can get familiar with here on the DataCamp people group.
Introducing Anaconda on Windows
For issue solvers, I suggest introducing and utilizing the Anaconda dissemination of Python. This part subtleties the establishment of the Anaconda dispersion of Python on Windows 10. I think the Anaconda dissemination of Python is the most ideal choice for issue solvers who need to utilize Python. Boa constrictor is free (albeit the download is enormous which can require some investment) and can be introduced on school or work PCs where you don’t have director access or the capacity to put in new projects. Boa constrictor comes packaged with around 600 bundles pre-introduced including NumPy, Matplotlib and SymPy. These three bundles are extremely helpful for issue solvers and will be talked about in resulting parts.
Anaconda is a bundle chief, a climate supervisor, and Python conveyance that contains an assortment of many open source bundles (numpy, scikit-learn, scipy, pandas to give some examples). In the event that you want extra bundles in the wake of introducing Anaconda, you can utilize Anaconda’s bundle supervisor, conda or pip to introduce those bundles. This is profoundly beneficial as you don’t need to oversee conditions between numerous bundles yourself. Conda even makes it simple to switch between Python 2 and 3 (you can find out about it here). Truth be told, an establishment of Anaconda is additionally a typical method for introducing Jupyter Notebooks.
Steps:
- Visit Anaconda.com/downloads
- Select Windows
- Download the .exe installer
- Open and run the .exe installer
- Open the Anaconda Prompt and run some Python code
1. Visit the Anaconda downloads page
Go to the following link: Anaconda.com/downloads
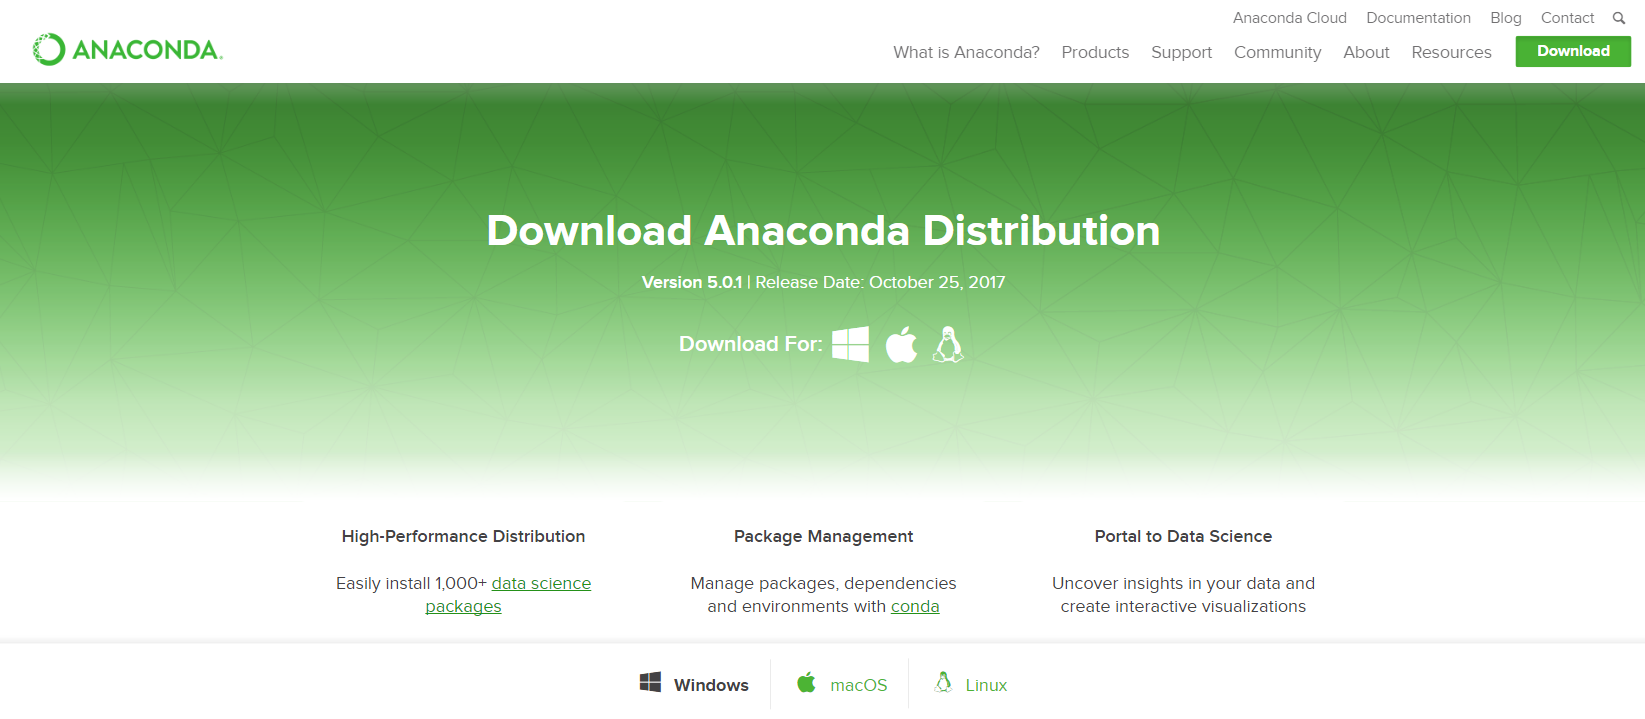
The Anaconda Downloads Page will look something like this:
2. Select Windows
Select Windows where the three operating systems are listed.

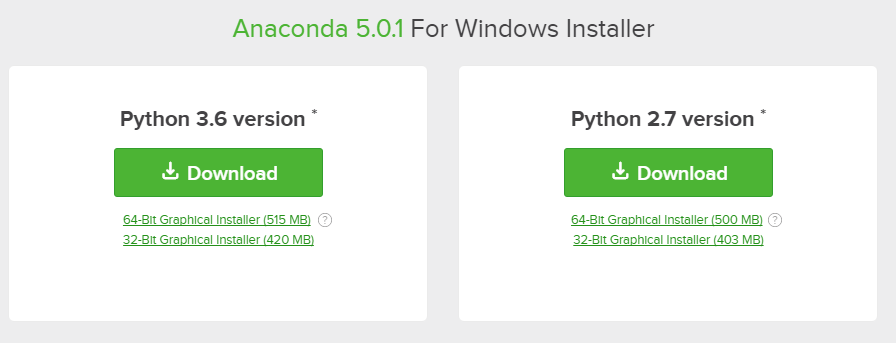
3. Download
Download the most recent Python 3 release. At the time of writing, the most recent release was the Python 3.6 Version. Python 2.7 is legacy Python. For problem solvers, select the Python 3.6 version. If you are unsure if your computer is running a 64-bit or 32-bit version of Windows, select 64-bit as 64-bit Windows is most common.
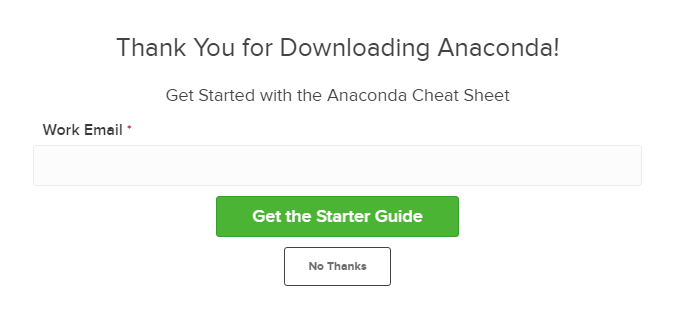
You may be prompted to enter your email. You can still download Anaconda if you click [No Thanks] and don’t enter your Work Email address.
The download is quite large (over 500 MB) so it may take a while to for Anaconda to download.

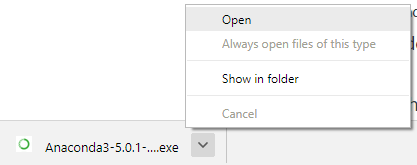
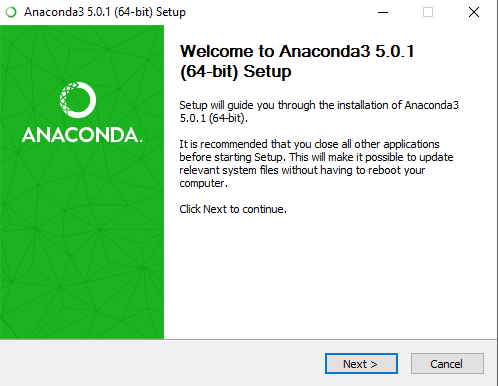
4. Open and run the installer
Once the download completes, open and run the .exe installer
At the beginning of the install, you need to click Next to confirm the installation.
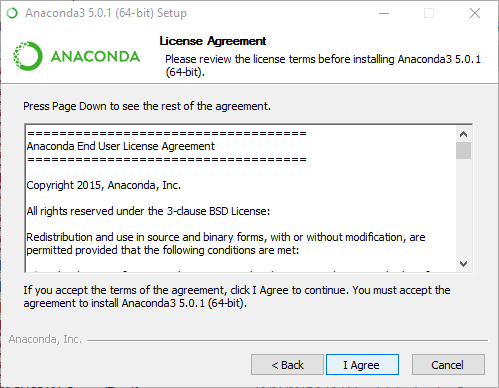
Then agree to the license.
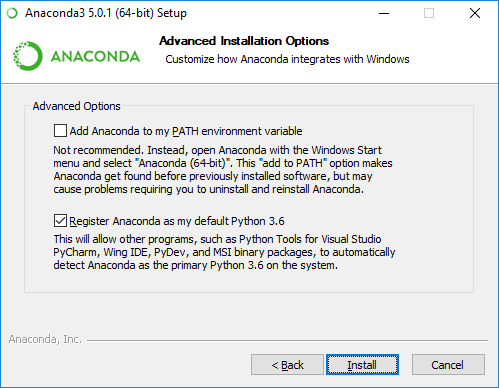
At the Advanced Installation Options screen, I recommend that you do not check “Add Anaconda to my PATH environment variable”
Also Read: Reverse a linked list