How dual monitors are set using HDMI?
How dual monitors are set up using HDMI? Before answering the question of how to setup dual monitors with HDMI, lets have the brief introduction of HDMI. HDMI (High Definition Multimedia Interface) a proprietary audio/video interface for transmitting compressed or uncompressed digital audio data and uncompressed video data from an HDMI-compliant device. For example: Display controller, Compatible computer monitor, Video projector, Digital television, or Digital audio device. It’s a trademark and brand name for a digital interface.
Usage basics
HDMI is an interface that is used for audio visual equipment for professional and domestic purposes. Its widely used for home entertainment systems to video displays and on many audio visual applications from televisions to monitors, Blu-Ray DVD players, game consoles and many more items. HDMI has many specifications and higher level of performance as compared to all the previously available systems that were used in the past. It has specificity to accommodate the latest audio and visual standards. It has a major use for photography and a mini-HDMI connector, DSLR and many forms of camera. There’s also a micro-HDMI connector for mobile devices like cell phones, etc.
Development of HDMI
Before the usage of HDMI, interconnectivity for video was difficult. SCART was used widely for Television devices and the old SCART were large and unwieldy. The cables were thick and it became difficult to route in audio video systems. Second approach was to use DVI. Another alternative was the use of cables for every single video component.
The development of first HDMI was fast and appear in late 2003. Then HDMI began to appear in 2004 on consumer HDTVs and in 2006 on digital cameras. On 25 October 2011, HDMI was developed according to the need of users and industry by an organization to develop and manage the standard.
HDMI versions
The newer versions of HDMI are more compatible as compared to old versions. Below you can see all the versions of HDMI but you won’t able to use latest functions of newer HDMI version. Its include HDMI1.0, HDMI1.1, HDMI1.2, HDMI1.3, HDMI1.3a, HDMI1.4, HDMI1.4a, HDMI2.0 and HDMI2.0a.
How to setup dual monitors with HDMI?
Setting up dual monitors helps immensely about your productivity. The excellent way to maximize your productivity is to using complex sets of editing tools for photos or video to having guides on a second screen for research or gaming from having multiple browser windows open.
Following are the steps that are necessary for setting up dual monitors with HDMI cable:
Step1: Check your I/O panel
Firstly, we have to check I/O panel of PC or it may be laptop to see HDMI cable is supported. Laptop must have two compatible display port of its own. A laptop screen itself can be used as a second monitor also.
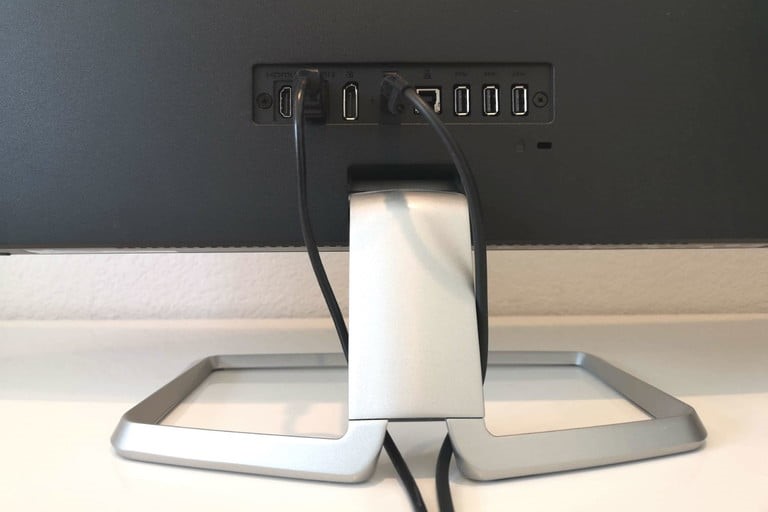
Step2: Make your monitors compatible and connect them
For laptop we can directly connect HDMI cable with monitor but in case of PC we have to connect our monitor with HDMI cables firstly and secondly monitor VGA cable is used. Either connect VGA cable directly with our monitor or we can also use VGA to HDMI convertor and connect it to the HDMI slot of monitor.
Step3: Go to display settings on Windows
At the left bottom of screen, select the Window logo and click settings. Fire up your PC, go to system then right click on the empty part of screen and choose display settings.
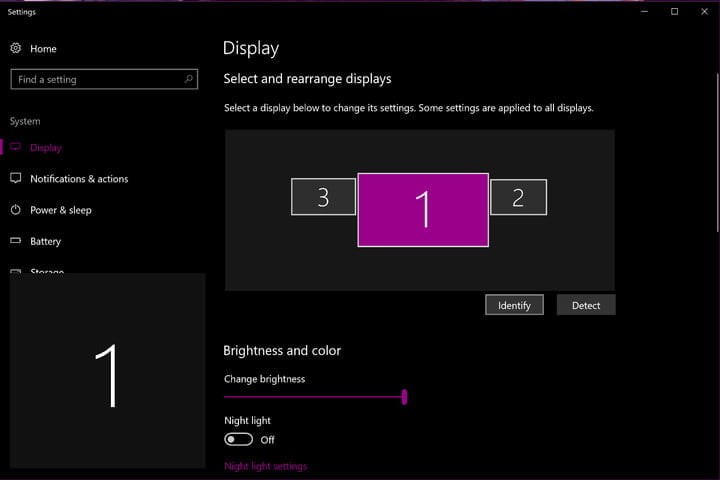
Step4: Choose your display tab
Select secondary monitor, scroll down in the display setting window and select the multiple displays list to see all option.
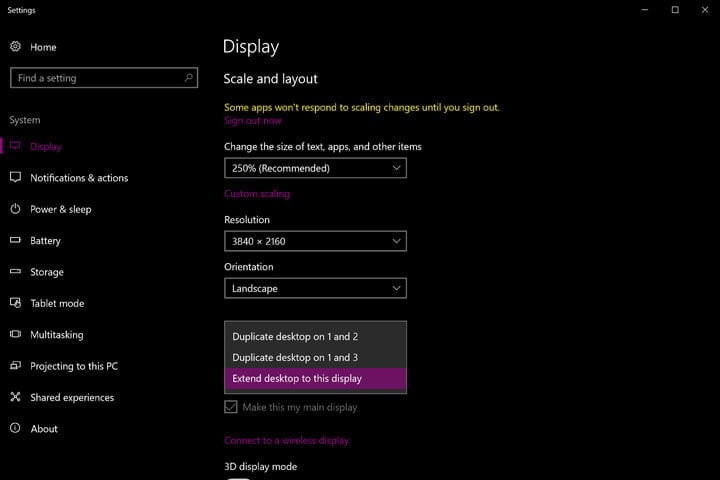
Step5: Review additional settings and adjust
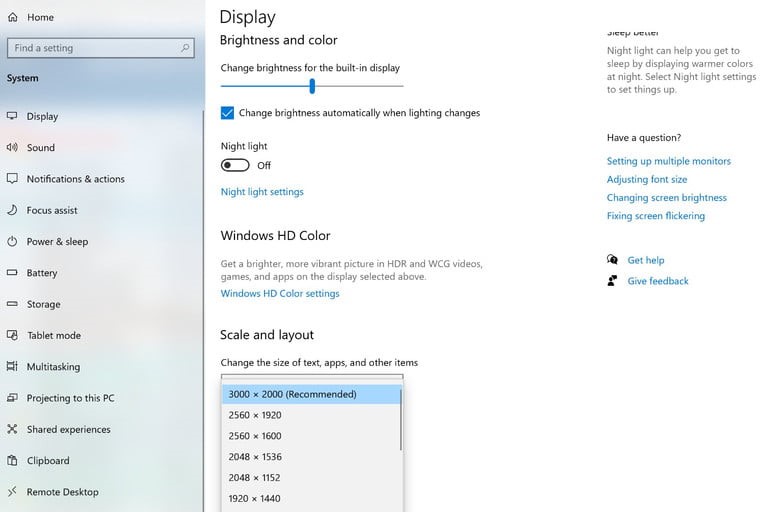
Adjust other features while you are in display setting so that both monitors are setup in the way you want. You can also change resolution and orientation of either computer by clicking and then selecting from the choices below. Here, you can change scale, brightness, and also enable night light mode when working in the dark condition.
Now, set individual settings for each monitors as you need, then start the experiment by exiting menu. Try dropping and dragging apps and browser between both of the monitors just to confirm that we have successfully updated the setup we need. Now, every time when you will start your PC, your two monitors setup will be ready and waiting for you.
Summary
Decide if your motherboard upholds dual monitors. Basically all advanced PCs’ motherboards support various monitors, however more established machines may not. While a few PCs may uphold at any rate one extra monitor, they may restrict the number of monitors you can have associated without a moment’s delay. You can check your motherboard for dual monitor support by doing the accompanying:
Discover your motherboard’s name.
Look into your motherboard’s name in a web index (e.g., Google).
Select an item that rundowns your motherboard’s highlights.
Search for a “Multi-Display”, “Multi-Monitor”, or “Dual Display” include.
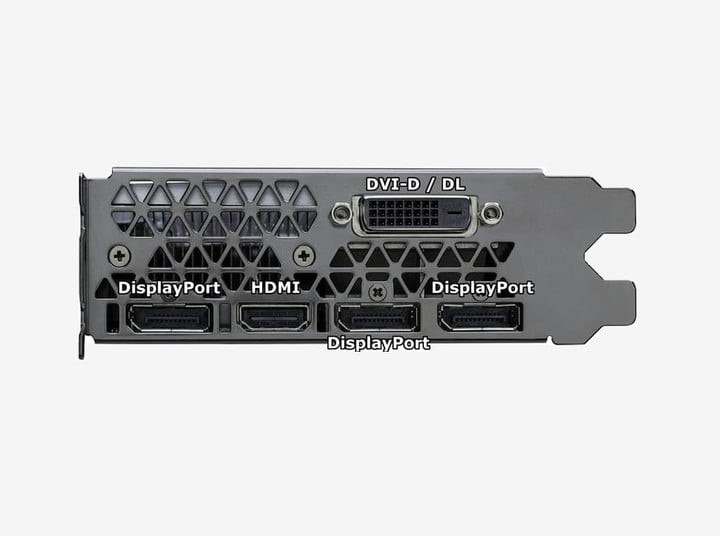
Decide your PC’s video association type. Most more current PC illustrations cards have in any event two video-out ports that permit you to associate numerous monitors. These are normally associated with the designs card on the rear of the PC case. Numerous PCs have a HDMI port or DisplayPort on them. These might be as an afterthought or back of the PC. In the event that your PC doesn’t have a devoted video-out port briefly monitor, verify whether it has a USB-C/Thunderbolt or USB 3.0 port. Coming up next is a portrayal of the distinctive video association types.
VGA: VGA ports are typically blue and rectangular with 15 openings. They for the most part have screw openings as an afterthought used to get the VGA link. VGA is utilized on old PCs. Most more up to date monitors don’t uphold a VGA association. In any case, you can associate a VGA to a fresher monitor utilizing a HDMI-to-VGA connector.
DVI: DVI ports are normally white with 24 openings. They likewise have an opening with 4 extra openings to one side. Like VGA ports, they frequently have screw openings on the sides to get the DVI link. DVI is another heritage video association that is generally utilized on more established PCs and monitors. It upholds a higher goal than VGA, however it doesn’t uphold present day HD or 4K showcases. Like VGA, most more current monitors don’t uphold DVI, yet you can associate a DVI association with a more up to date monitor utilizing a DVI-to-HDMI connector.
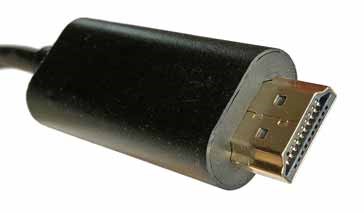
HDMI: HDMI ports are little and slight, rectangular-molded ports with the base corners adjusted internal. Some more modest PCs may utilize a smaller than usual HDMI or miniature HDMI association. These ports are about a similar shape as an ordinary HDMI link, however a lot more modest.
HDMI is the norm for most more current monitors. It is utilized on most PC monitors and TVs HDMI upholds up to 4K goal just as high powerful reach tone (HDR). While HDMI is the norm, there are various types. HDMI 1.4 can uphold 4K at 30 casings for every second (fps) or HD (1080p) at 120 edges for each second. HDMI 2.0 can uphold 4K at 60 casings for every second. HDMI 2.1 can uphold up to 10k and 4K at 120 casings for each second and higher resolutions.[1]
DisplayPort: DisplayPort yield ports are slender and rectangular-formed with the base right corner cut. A few PCs may utilize a little DisplayPort association, which is a similar shape as a DisplayPort, however more modest. DisplayPort is a fresher showcase association for the most part utilized with PC monitors instead of TVs. DisplayPort upholds AMD’s FreeSync and Nvidia’s G-Sync. DisplayPort 1.2 can uphold 4K at 60 edges for every second.
DisplayPort 1.3 can uphold 4K at 120 casings for every second. DisplayPort 1.4 can uphold 8K at 60 casings for every second and HDR. DisplayPort 2.0 backings up to 16K at 60 edges for each second. A DisplayPort association can uphold various monitors associated together from a solitary DisplayPort association.
USB-C/Thunderbolt 3: A USB-C port has a little, pill-formed port. Thunderclap 3 ports have a similar shape as a USB-C port and backing a USB-C association, yet they will for the most part have a symbol that takes after a lightning bolt close to them. USB 3.0 ports by and large have a USB Type-A port, which is rectangular-formed. You can interface a USB 3.0 port to a HD monitor utilizing a USB-to-HDMI connector. USB-C yields can interface with a monitor and show up to 4K at 60 edges for every second. Thunderclap 3 associations support considerably higher showcase goals. Be that as it may, not all monitors have a USB-C association.
Also read here
https://eevibes.com/how-to-enable-motherboard-hdmi/
You can buy VGA cable from here
https://www.daraz.pk/vga-cables/
Also watch here
http://youtube.com/watch?v=oS97wVmF3lY