Table of Contents
Interfacing of hall sensor with Raspberry Pi
How to Interface Hall Sensors with Raspberry Pi? Foundation of the Raspberry Pi may be observed inside the university of Cambridge’s laptop Laboratory in 2006. laptop scientist Eben Upton, along side Rob Mullins, Jack Lang and Alan Mycroft, have been involved that incoming computing undergraduate students had grown divorced from the technical aspects of computing.
This became largely because of school syllabuses that placed an emphasis on the use of computers rather than knowledge them. Off the returned of this initial situation, the Raspberry Pi basis became formed.
Over the next six years the group labored on growing a reasonably-priced and reachable tool that might help schools to educate principles such as programming, as a result bringing students towards knowledge how computing works. The Raspberry Pi’s initial industrial launch changed into in Feb 2012. given that then, the board has gone via a number of revisions and has been to be had in models, the ones being version A and model B.
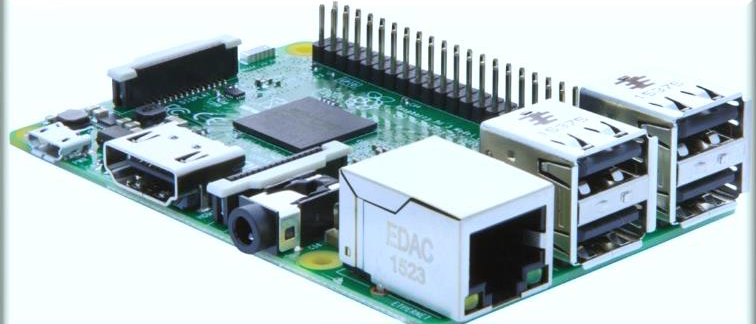
Raspberry Pi 2 Model B
Raspberry Pi is a chain of small single-board computers made in the uk through the Raspberry Pi foundation in association with Broadcom. The Raspberry Pi venture firstly leaned toward the promoting of teaching primary computer technology in faculties and in developing nations. The unique version have become extra popular than predicted, promoting outside its target market for makes use of such as robotics. it’s miles broadly used in lots of areas, inclusive of for climate monitoring, because of its low cost, modularity, and open design. it is commonly used by laptop and electronic hobbyists, due to its adoption of HDMI and USB gadgets.
The Raspberry Pi is a low fee, credit card sized computer that plugs right into a pc screen or tv, and uses a general keyboard and mouse. it is a successful little device that allows humans of all ages to discover computing, and to learn how to software in languages like java and Python. It’s capable of doing the whole lot you’d anticipate a computer laptop to do, from surfing the internet and gambling high-definition video, to making spreadsheets, phrase-processing, and gambling games.
The Raspberry Pi has the capability to interact with the outdoor world, and has been used in a big range of virtual maker projects, from track machines and discern detectors to climate stations and tweeting birdhouses with infra-purple cameras.
Hardware specifications of Raspberry Pi
The brand new Raspberry Pi is constructed on the returned of the Broadcom BCM2836. The BCM2836 is a machine-on-a-chip processor containing four ARM cores and Broadcom’s VideoCore® IV snap shots stack. In contrast to this, preceding Raspberry Pi A and B fashions best contained a single core. On pinnacle of this, several other components make up the device, which includes USB, RCA, and microSD card storage. The preceding Raspberry Pi version B handiest contained USB drives and a microUSB as compared to the four USB drives and microUSB of the second one version. So, as compared to earlier models, model 2 is a miles more capable computer, but still stays at the identical fee. The brought advantage of having multiple cores allows us to explore specific programming techniques for making use of them.
Comparison of Different Models of Raspberry Pi
The Raspberry Pi 2 packed numerous power into the equal small frame that the Raspberry Pi has constantly had. Now the Raspberry Pi 3 has controlled to do the same, usurping the Pi 2 because the maximum powerful Pi yet. From a pure specifications viewpoint, the Pi three blessings from a lift of processor pace, upping the Pi 2’s 900MHz quad-core ARM Cortex-A7 CPU to a 1.2GHz quad-core ARM v8. examine this to the Pi B+’s single-middle 700MHz ARM v6, and also you’ll understand that the Pi three is a powerful pocket-sized pc.
In terms of pure performance, running the Whetstone Pi A7 benchmarking tool revealed that the Pi 3 is around 65% quicker than the Pi 2, scoring 711 to the P2’s 432.

whilst its increase in energy may also only be marginal, the brand new processor is without a doubt more electricity-green. at the same time as the Pi 2 usually ran at a constant 900MHz, the Pi 3 drops down to 600MHz when idle, meaning it draws far less energy – perfect if you plan to run your Pi via a battery.

The rest of the Pi 3’s specs continue to be similar to the Pi 2 (1GB of RAM, 4 USB 2 ports, 100Mbits/sec Ethernet port, HDMI, 3.5mm audio jack and microSD slot), even though it does feature more than one welcome additions: wi-fi and Bluetooth four. those who grew uninterested in wasting USB ports through plugging in wireless adapters and Bluetooth dongles receiver’s ought to worry anymore.
The Raspberry Pi three’s wireless chip is also reasonably superb for a device without a separate antenna. In our review, the Pi 3 performed information-transfer speeds of 12Mbits/sec, as compared with 26Mbits/sec from an 802.11n pc whilst positioned 10 meters far from the router. while moved to inside a meter of the router, speeds rose to 19Mbits/sec at the Pi 3, as compared to 84Mbits/sec at the pc. It’s worth noting that, if you don’t need to use Bluetooth or wireless, the Pi 2 or maybe the Pi B+ can also better in shape your needs, however with 1/2 as a great deal RAM and non-powered USB ports, the Pi B+ will be particularly underpowered.
Programming the Raspberry Pi
In contrast to the Arduino, which requires handiest a USB cable and a pc to set up, the Raspberry Pi has greater hardware requirements to rise up and running. After the preliminary setup, even though, a number of those peripherals will no longer be required. Required Hardware the following hardware is required for the preliminary setup of your Raspberry Pi. if you turn out to be connecting in your Raspberry Pi over SSH, then some of the hardware underneath will now not be needed after the initial setup. ➢ A power supply To connect to a power socket, all Raspberry Pi models have a USB port (the same found on many mobile phones): either USB-C for Raspberry Pi 4, or micro USB for Raspberry Pi 3, 2 and 4.
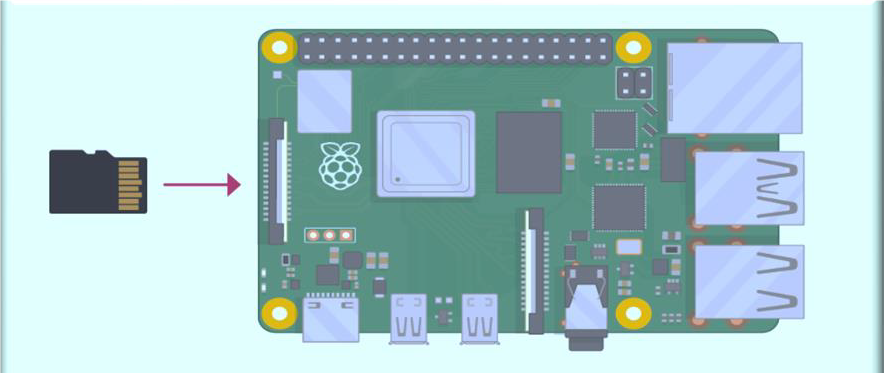
A microSD card Your Raspberry Pi needs an SD card to store all its documents and the Raspberry Pi OS running device. You want a microSD card with a capability of at least 8GB. Many dealers deliver SD cards for Raspberry Pi which might be already set up with Raspberry Pi OS and ready to head.
- A keyboard and a mouse To begin using your Raspberry Pi, you need a USB keyboard and a USB mouse. when you’ve set up your Raspberry Pi, you may use a Bluetooth keyboard and mouse, but you’ll need a USB keyboard and mouse for the first setup.
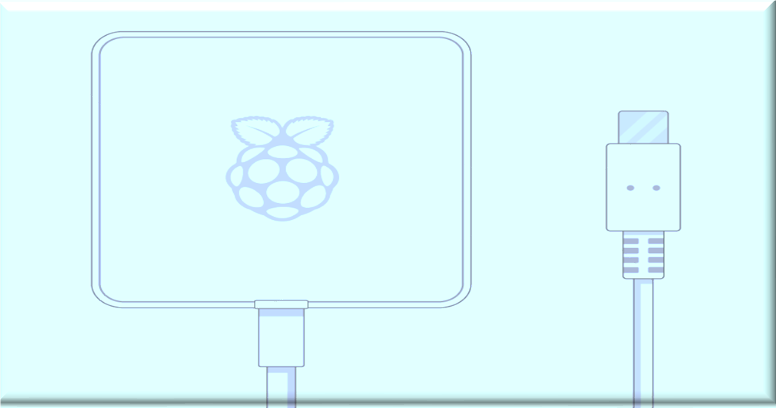
- A TV or computer screen To view the Raspberry Pi OS desktop environment, you need a screen, and a cable to link the screen and your Raspberry Pi. The screen can be a TV or a computer monitor. If the screen has built-in speakers, Raspberry Pi is able to use these to play sound.
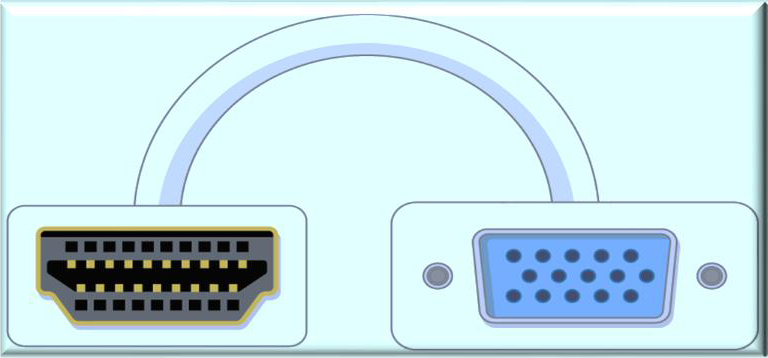
- HDMI Your Raspberry Pi has an HDMI output port that is well matched with the HDMI port of most contemporary TVs and laptop monitors. Many laptop monitors may also have DVI or VGA ports.
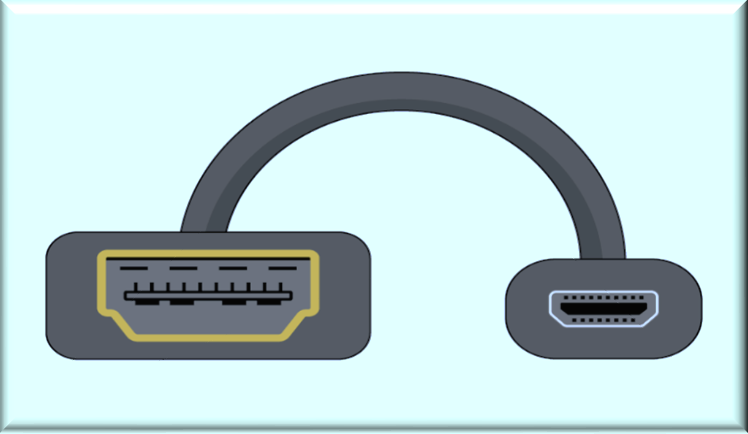
DVI In case your display has a DVI port, you could join your Raspberry Pi to it the usage of an HDMI to DVI cable.
VGA Some screens only have a VGA port.

To connect your Raspberry Pi to a screen, you can use a HDMI to VGA adapter.
Optional Extras:
➢ A case you may want to place your Raspberry Pi in a case. This isn’t vital, but it’s going to provide safety on your Raspberry Pi. if you’d like, you may use the legit case for Raspberry Pi four or Raspberry Pi 0 or Raspberry Pi 0 W.
➢ Headphones or speakers
The large Raspberry Pi models (but no longer Raspberry Pi zero or Raspberry Pi zero W) have a fashionable audio port like the one on a telephone or MP3 participant. if you want to, you may connect your headphones or speakers in order that your Raspberry Pi can play sound. If the display you’re connecting your Raspberry Pi to has built-in audio system, Raspberry Pi can play sound through those.
An Ethernet cable
The massive Raspberry Pi models (but now not Raspberry Pi zero or Raspberry Pi 0 W) have a fashionable Ethernet port to connect them to the net; to connect Raspberry Pi zero to the net, you want a USB to Ethernet adapter.
Software :
The operating machine for the Raspberry Pi is saved on a microSD card. if your card did no longer come from an reliable Raspberry Pi package, then you definitely ’ll need to install the working device on it. There are more than one ways to installation the operating system on your Raspberry Pi. you could find out extra approximately the unique installation options on the Raspberry Pi internet site.
on this segment, we will examine approaches to put in Raspbian, the formally supported Raspberry Pi working machine, that is primarily based on Debian Linux.
The Raspberry Pi OS using the Raspberry Pi Imager
Using the Raspberry Pi Imager is the easiest way to install Raspberry Pi OS on your SD card. Download and launch the Raspberry Pi Imager o Go to the Raspberry Pi downloads web page o click at the link for the Raspberry Pi Imager that fits your running machine o whilst the down load finishes, click on it to launch the installer Using the Raspberry Pi Imager Anything that’s saved at the SD card might be overwritten all through formatting. in case your SD card currently has any files on it, e.g. from an older model of Raspberry Pi OS, you can wish to again up those files first to prevent you from permanently losing them.
whilst you launch the installer, your operating system can also try to block you from strolling it such that : o If this pops up, click on “ extra info” after which “run anyway” o observe the commands to put in and run the Raspberry Pi Imager o Insert your SD card into the laptop or laptop SD card slot o in the Raspberry Pi Imager, select the OS which you want to put in and the SD card you would love to install it on Note: you will want to be connected to the internet the primary time for the the Raspberry Pi Imager to download the OS that you choose.
That OS will then be stored for destiny offline use. Being online for later uses approach that the Raspberry Pi imager will continually give you the state-of-the-art version. o Then click the write button o Look forward to the Raspberry Pi Imager to complete writing o Once you get the following message, you could eject your SD card.
The Raspberry Pi OS From Noobs: If for a few purpose you may’t use the Raspberry Pi Imager, then you may download NOOBS (New Out Of the container software) and use it to install Raspbian on a microSD card. First, head to the NOOBS download web page to download the present day model and additionally down load the SD card formator and layout your card.
Now that you have the microSD card and required hardware prepared, the very last step is to attach the entirety collectively and configure the operating machine. let’s start out by connecting all of the peripherals: o Insert the microSD card into the cardboard slot on the lowest of the Raspberry Pi. o join the keyboard and mouse to any of the four USB ports. o join a display to one of the HDMI ports the use of an HDMI cable particular on your Raspberry Pi version. o connect a power deliver to the USB electricity port.
With the peripherals related, move ahead and energy in your Raspberry Pi to configure the operating device. if you hooked up Raspbian with the Raspberry Pi Imager, then there’s not anything else to be able to do. you could pass down to the subsequent segment to finish the setup. Raspberry Pi using Python : one of the high-quality things about operating with Python at the Raspberry Pi is that Python is a high-quality citizen at the platform. The Raspberry Pi basis specially selected Python as the main language because of its electricity, versatility, and simplicity of use. Python comes preinstalled on Raspbian, so that you’ll be equipped to begin from the get-move. There are three ways to program Raspberry Pi using python which are as fallows
Running Program via Terminal
➢ Python packages may be carried out the usage of a terminal window, however before we open the terminal, we need to understand the entire direction to the Python application. For this example, my Python software is positioned in files > Python > principal.py.
➢ Open a terminal window and use the “cd” command to trade the running directory to the directory that contains your Python application.
➢ At this factor, we can now execute the Python program by using the usage of the “python” command. This command will execute the Python document that is stated after the command.
Running Programs via Python IDE
➢ Raspbian comes with some of IDEs for programming, and this kind of IDEs is the respectable Python IDE. To open this, click the Raspbian brand and then navigate to Programming > Python three (IDLE).
➢ With the IDE loaded, click on record > Open and then navigate on your Python program.
➢ while the report opens, you can run the program through clicking Run > Run Module or by pressing F5 on the keyboard.
Running Program via Thonny: ➢ Thonny is every other Python IDE that boasts some of capabilities, inclusive of a effective debugger that can be used to step via code and watch variables. This IDE can also be used to run Python applications. First, click on the Raspbian logo and then navigate to Programming > Thonny Python IDE. ➢ in the IDE, click record > Open and then navigate to your Python software. With the program loaded, click Run > Run present day script.
Interfacing of HALL sensor with Raspberry Pi
Hall sensors are sensor which produce a electrical signal at its output while it comes in touch with a magnetic discipline. Hall impact sensor can discover the presence of a magnetic field and is regularly used for positioning objects or measuring rotation. for instance you can use one to degree the speed of a motorbike wheel by way of attaching a magnet to one of the spokes. The analog value of the electrical sign at the output of the sensor is a function of the energy of the magnetic area. hall sensors are anywhere these days, they may be being used for unique motives and in all kind of devices from mobile phones to switches, for the size of pace, function and distance in cars and in other car enterprise based products.
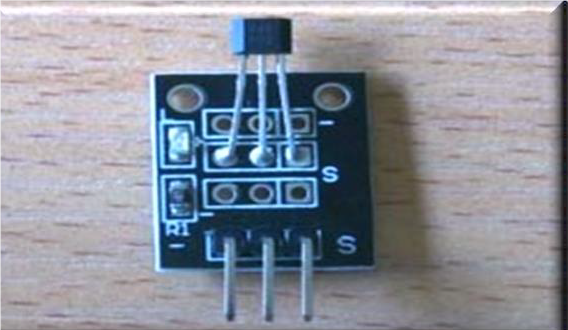
Required components: The following components are required to build this project; ➢ Raspberry pi 2 Model B ➢ SD card (8gb Minimum) ➢ Hall Effect Sensor ➢ Jumper wires ➢ Breadboards ➢ LAN Cable ➢ Power source Some optional components can include: ➢ Monitor ➢ Keyboard and Mouse ➢ HDMI cable ➢ Wi-Fi Dongle
Circuit Diagram:
For using Hall effect sensor with Raspberry Pi, connect the components according to the schematic below.
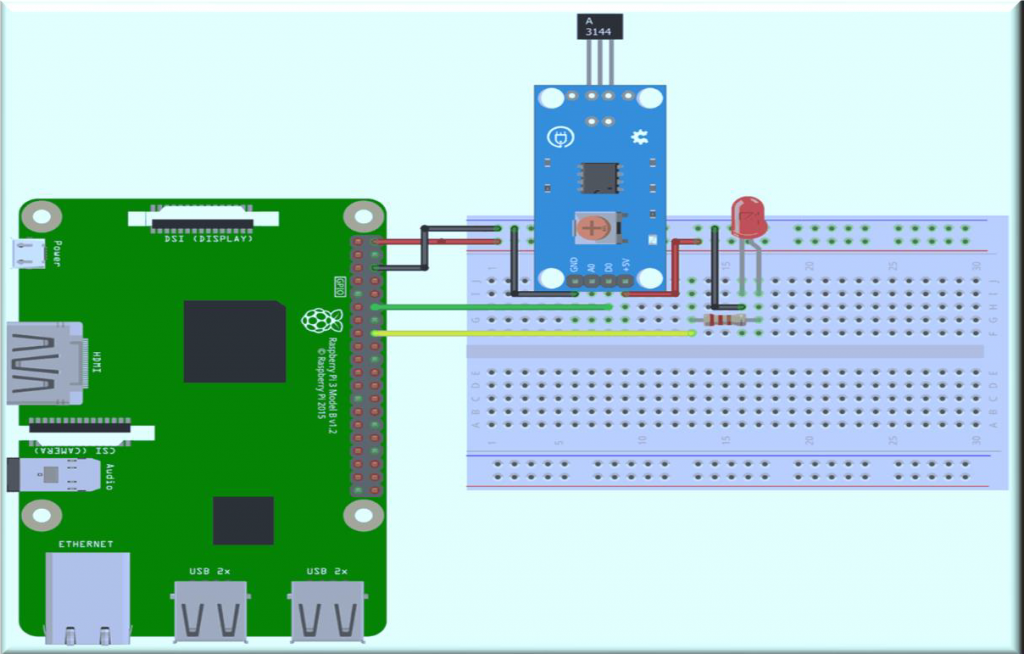
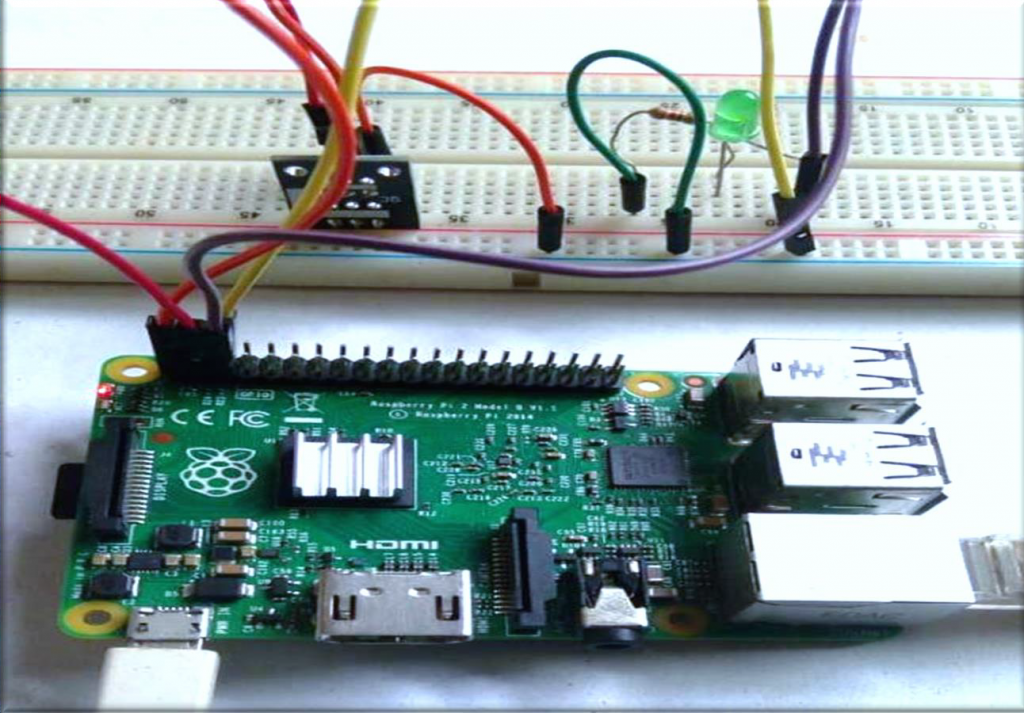
Code: import RPi.GPIO as gpio gpio.setmode(gpio.BCM) gpio.setwarnings(False) hallpin = 2 ledpin = 3 gpio.setup( hallpin, gpio.IN) gpio.setup(ledpin, gpio.OUT) gpio.output(ledpin, False) while True: if(gpio.input(hallpin) == False): gpio.output(ledpin, True) print(“magnet detected”) else: gpio.output(ledpin, False) print(“magnetic field not detected”)
Triggering Distance: The triggering distance became approx 15mm. This made the setup best for my application. This assumed that the stop of the cylinder is inline with the flat face of the hall impact sensor. different magnets could almost actually bring about a special triggering distance so that you might also should test with opportunity magnets if your software requires a specific distance.
Also read here
https://eevibes.com/hardware-devices/raspberry-pi/design-of-a-buzzer-alarm-with-raspberry-pi/